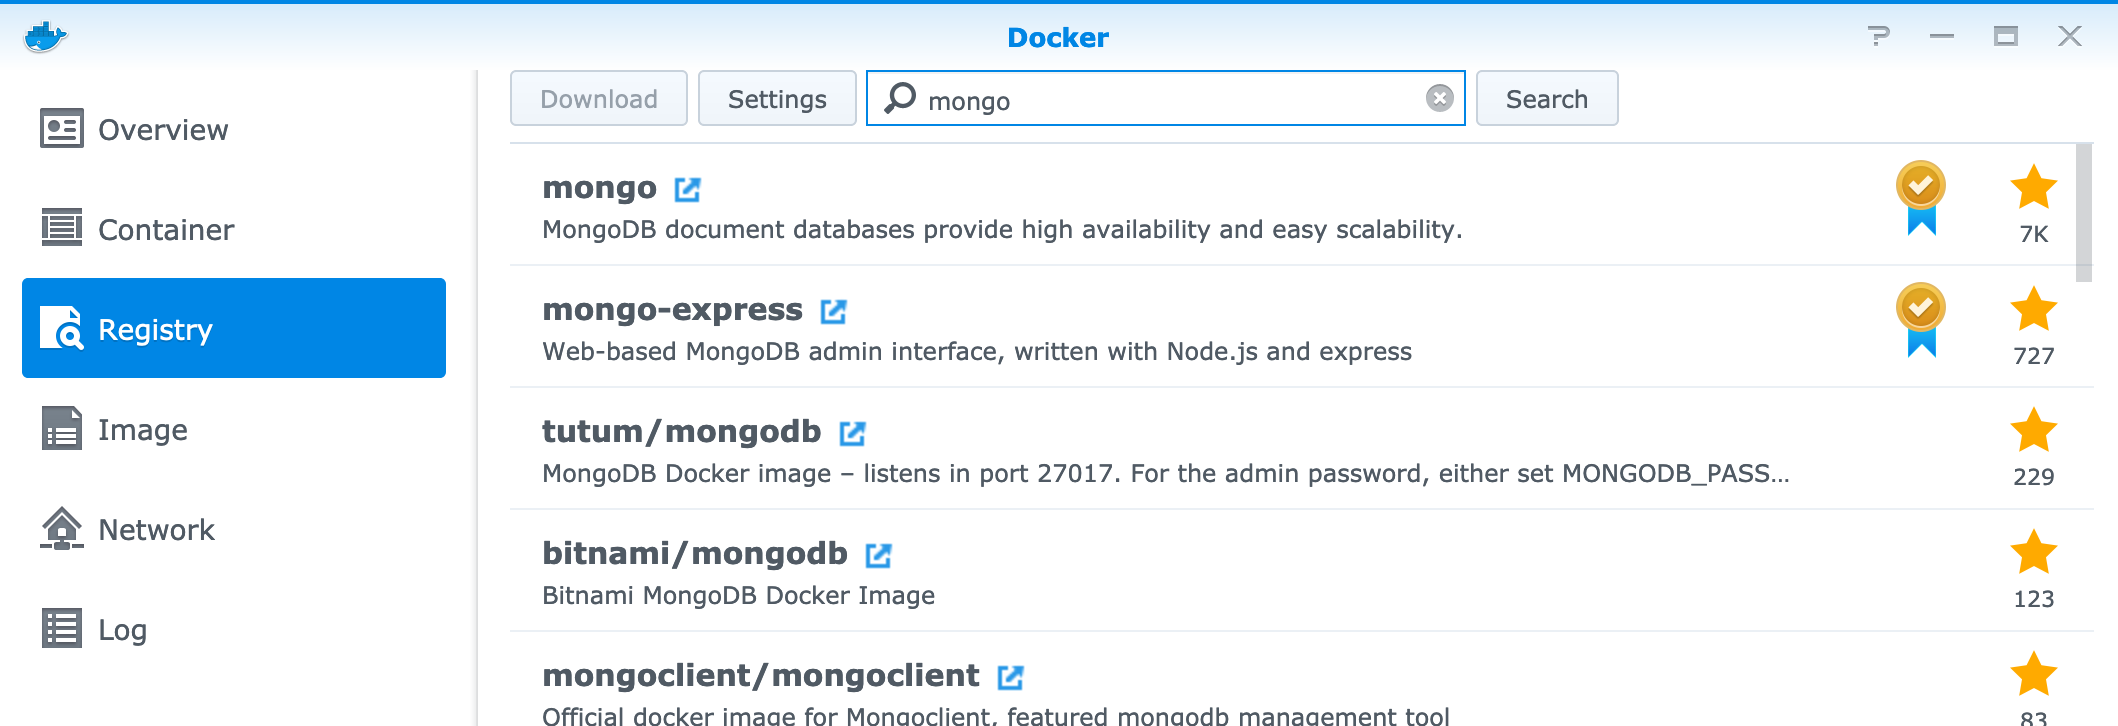
The first thing you need to do is to download a mongo image for Docker (Use the Registry Tab to find the package you are looking for and grab it from the URL). You can use the following image mongo:latest to create your container with. You will also need to download a rocketchat/rocket.chat image to create a second container for rocketchat.
Steps to configure a mongodb Docker container for use with Rocket.Chat
- Create the MongoDB container using the images downloaded above
- Configure the various environment variables
- Configure the local port to use the same as the Docker container – 27017
- Configure the volume so that the data is not stored within the docker image
- Configure mongod.conf for replication needed for rocketchat
- Configure a MongoDB replica set to meet the rocketchat requirements
- Configure an admin user for MongoDB
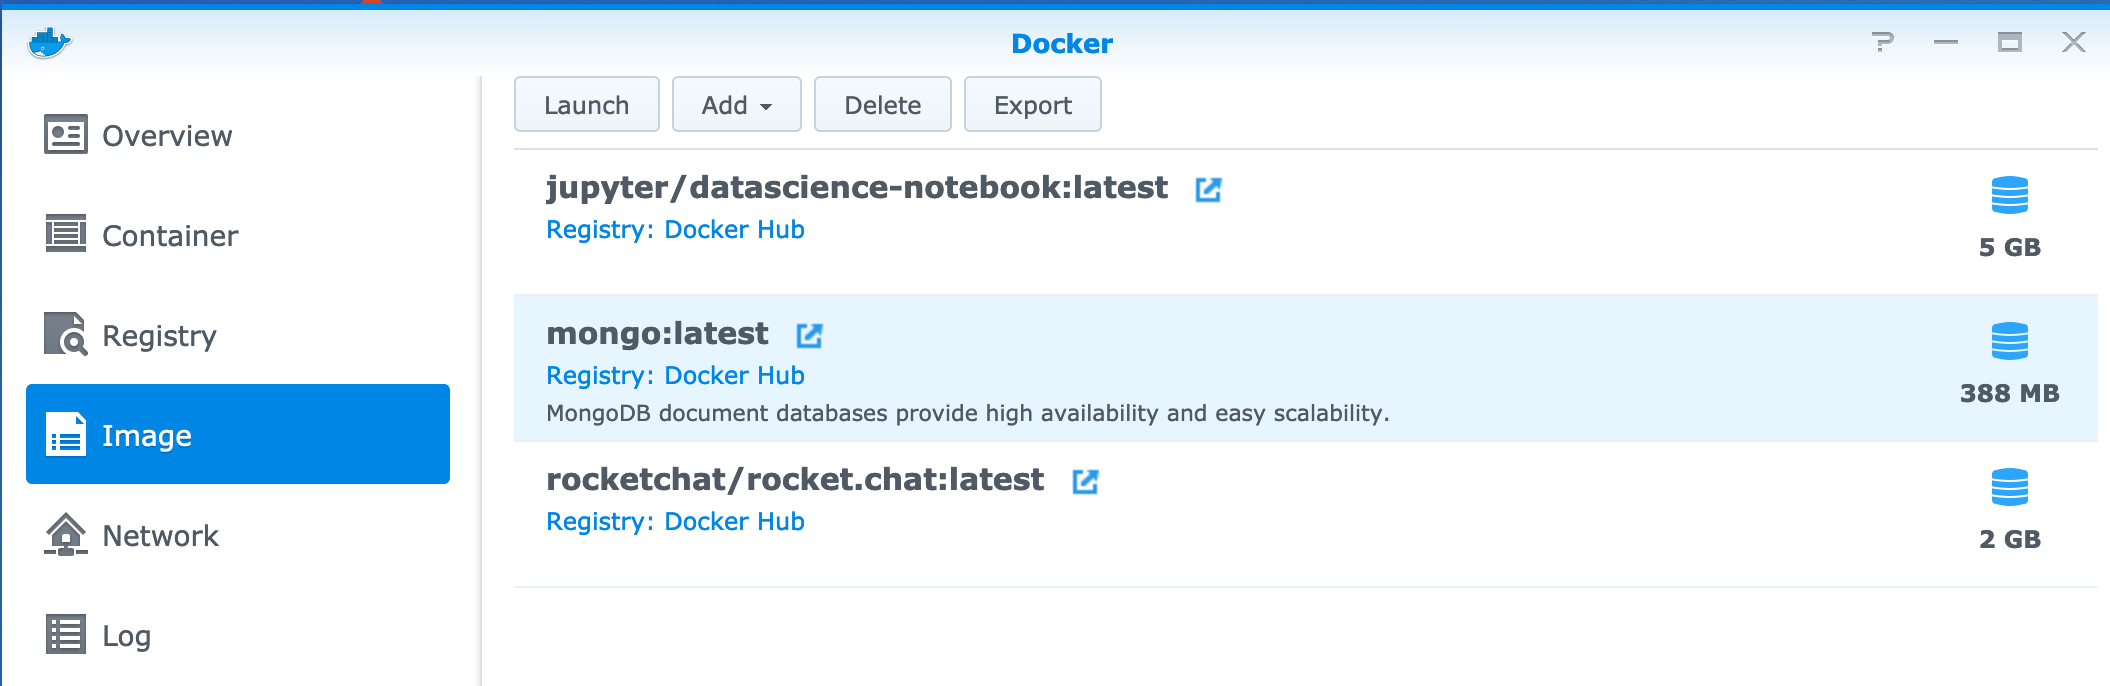
- Create the MongoDB container using the images downloaded above by highlighting the image and hitting the “Launch” button.
2. Configure the various environment variables
When Creating the MongoDB container it is IMPERATIVE that you issue the following Execution Command as an environment variable under the “Advanced Settings” tab. You can’t add this once the container is created so don’t forget. This command will setup MongoDB to use the replication that is needed for Rocket.Chat
mongod --oplogSize 128 --replSet rs01
Add the new variables and values as indicated below, take note of the “=”.
MONGO_INITDB_DATABASE = db
MONGO_INITDB_ROOT_USERNAME = root
MONGO_INITDB_ROOT_PASSWORD = YourPASSWORD

3. Once the mongo container environment variables have been configured go to the “Port Settings” and change the local port from “Auto” to use the same as the Docker container, 27017

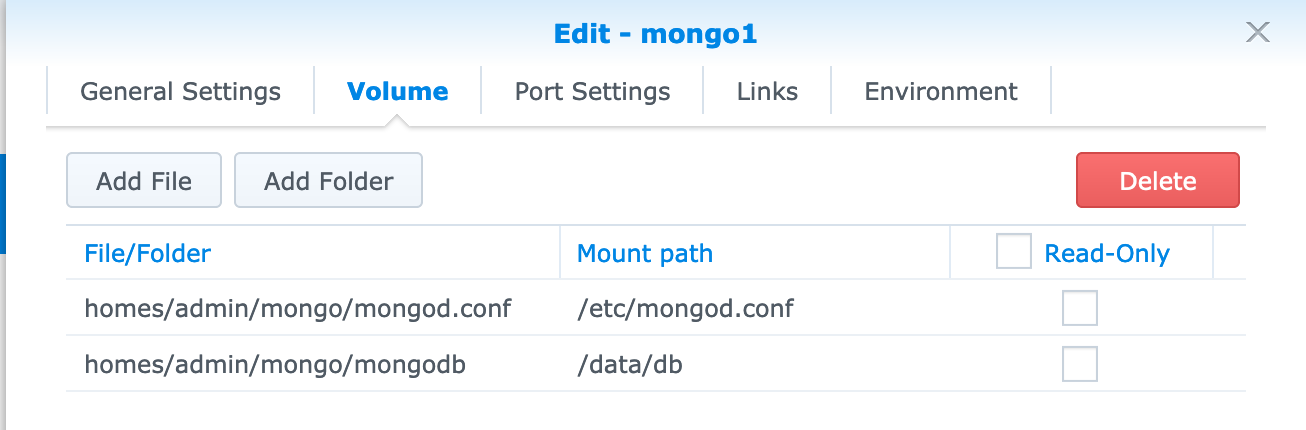
4. Configure the volume so that the data is not stored within the docker image. This allows you to easily upgrade your mongoDB container without disrupting your data which resides on the server, not in the container itself. You will need to create the folders mongodb and mongod.conf on your Synology volume.
your/path/to/mongodb/mongo.conf   /etc/mongod.conf
your/path/to/mongodb/db      /data/db
You should be able to start the mongodb container now.
5. Configure mongod.conf for replication needed for rocketchat. This will be created in the folder you created (mongod.conf) on your Synology Volume.
replication:
    replSetName: "rs01"
6. Once the Mongo container is up and running you will need to configure an admin user for MongoDB. Open the “Terminal” tab and use login to mongoDB with the following command.
mongo -u root -p <pass> --authenticationDatabase admin
7. Configure a MongoDB replica set to meet the rocketchat requirements
rs.initiate({ _id: 'rs01', members: [ { _id: 0, host: 'localhost:27017' } ]})

use admin

db.createUser({user: "admin", pwd: passwordPrompt(), roles: [{role: "readWrite", db: "db"}]})
Steps to configure a rocketchat Docker container for use with mongoDB
- Configure Local Port Settings (3000) to match Docker port setting (3000)
- Configure a “link” and an “alias” between mongo and rocketchat containers
- Configure Environment Variables for rocketchat
- Start Rocketchat Container and pay close attention to the logs for clues
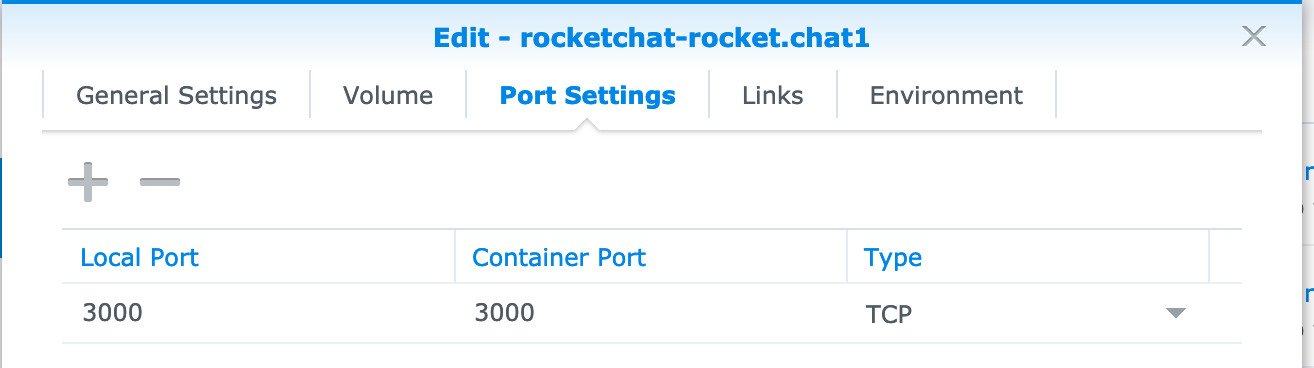
- Configure Local Port Settings (3000) to match Docker port setting (3000)
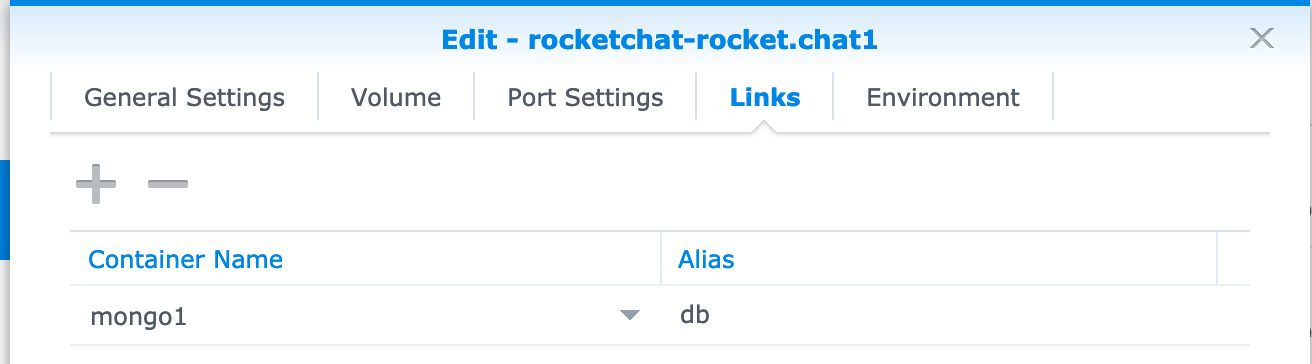
2. Configure a “link” and an “alias” between mongo and reocketchat containers
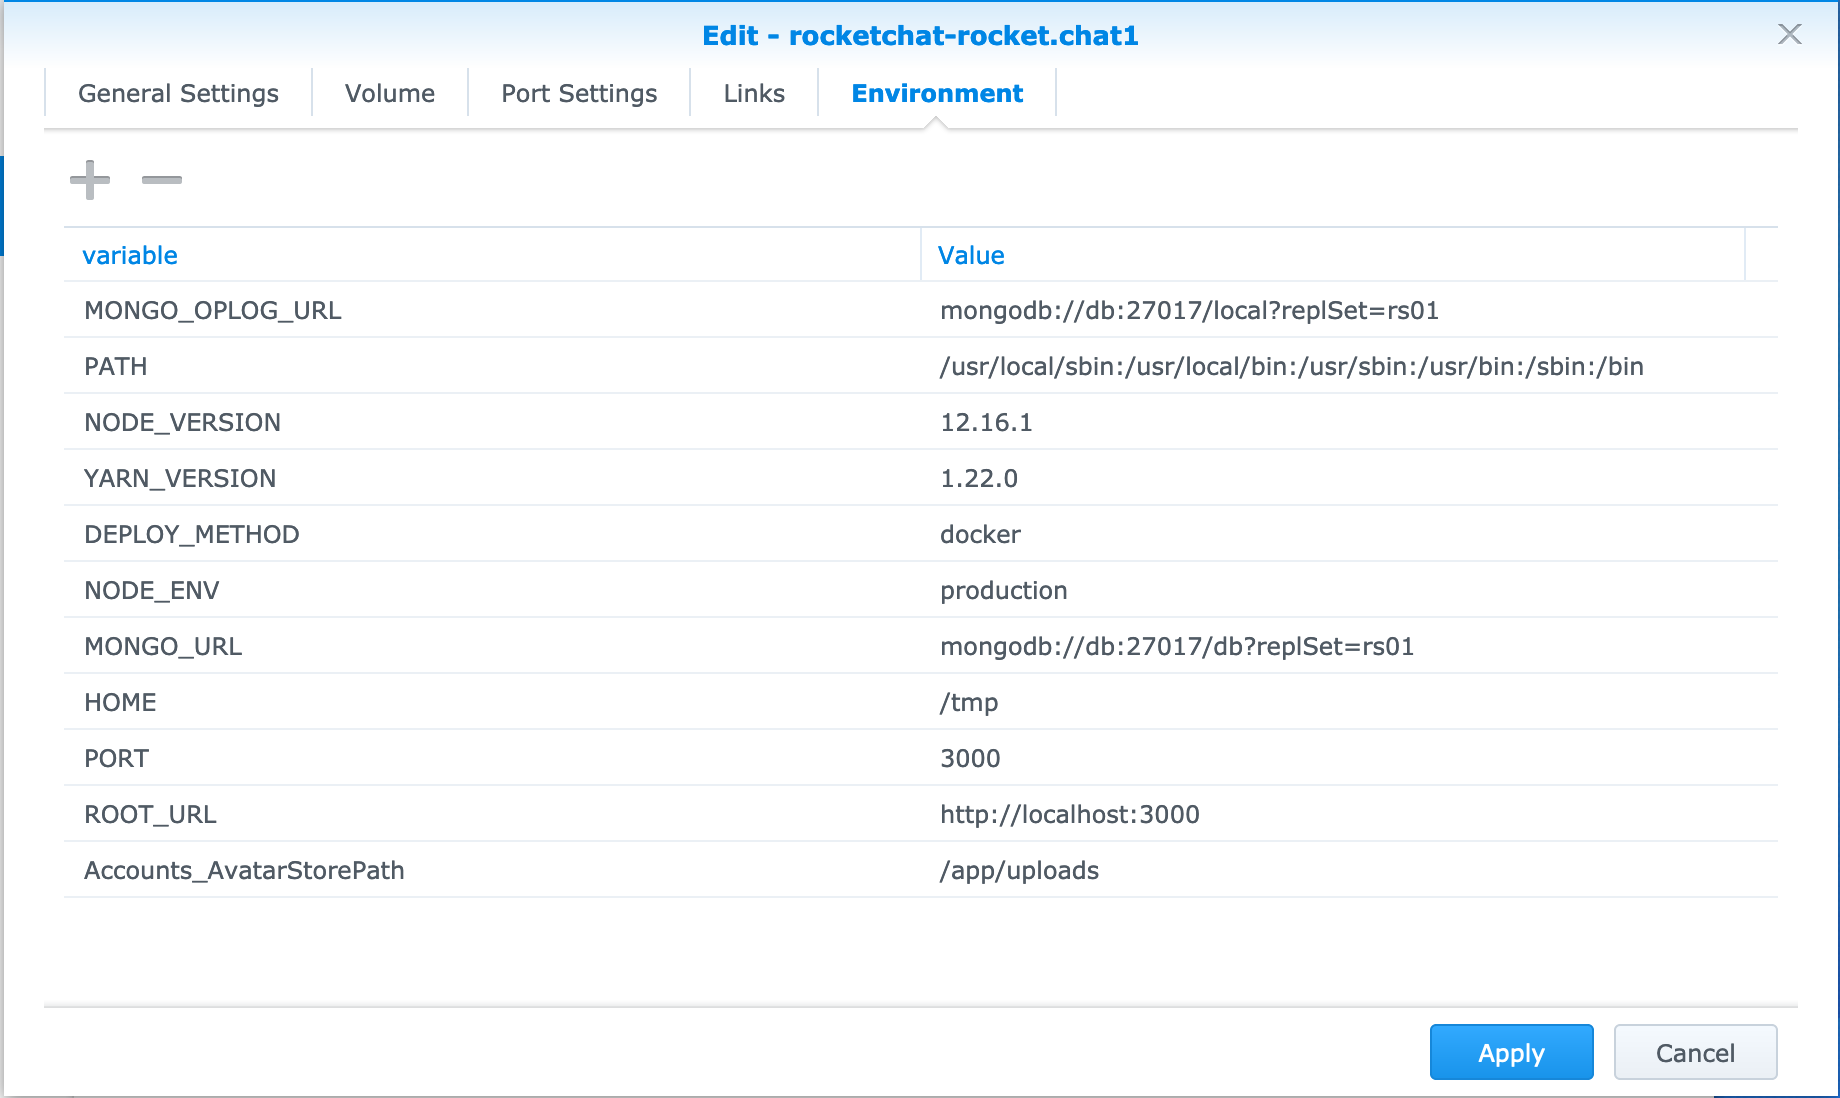
3. Configure Environment Variables for rocketchat.
MONGO_URL = mongodb://root:yourRootPass@db:27017/db?authSource=admin
MONGO_OPLOG_URL = mongodb://root:yourRootPass@db:27017/local?authSource=admin
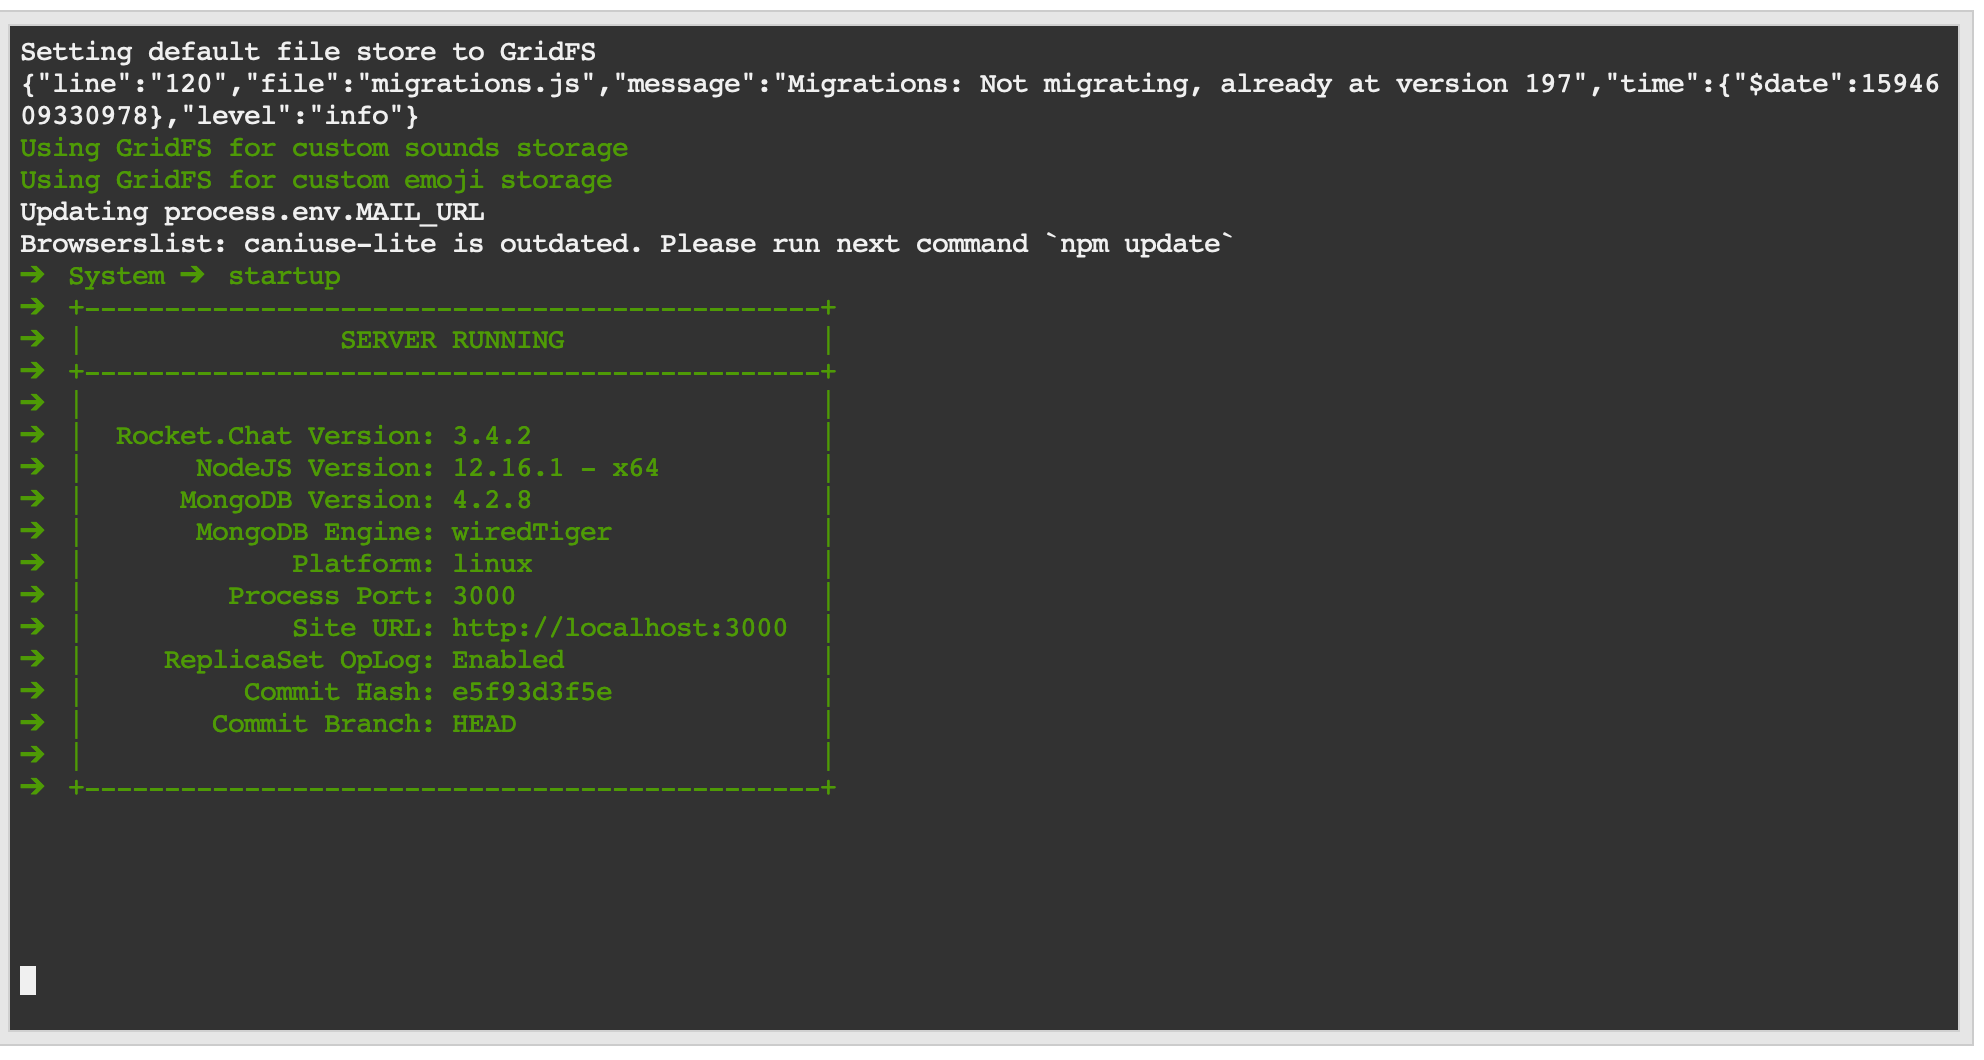
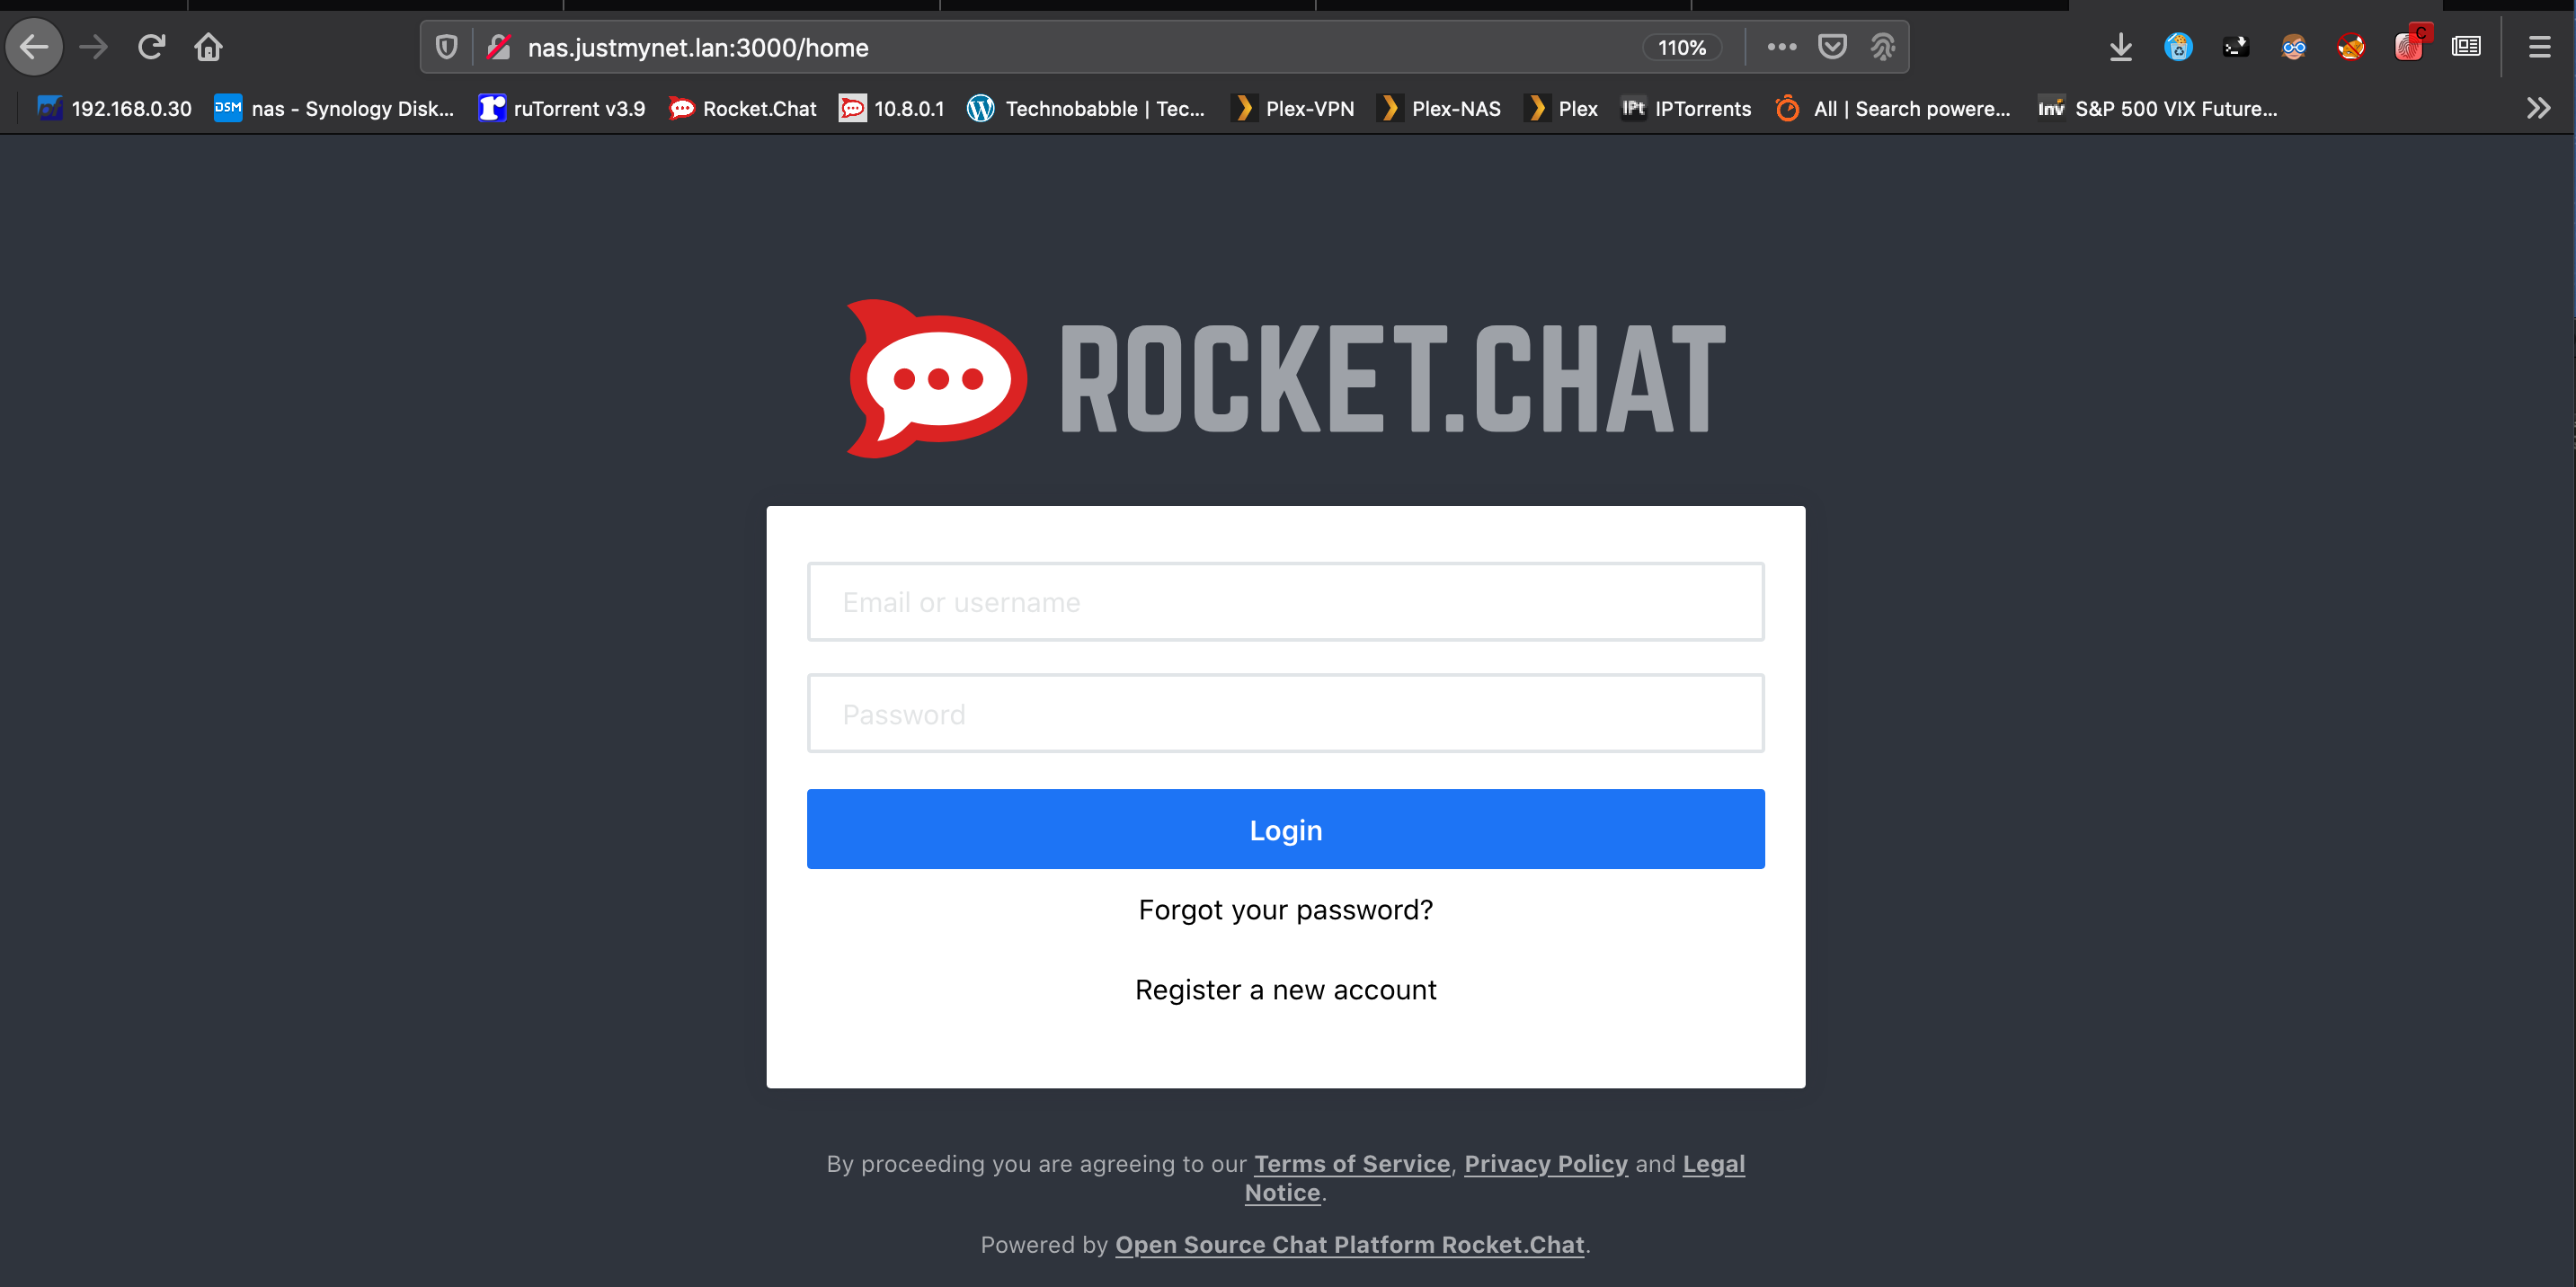
4. Start rocketchat container and pay close attention to the logs for clues. Go to the “Terminal” tab and wait a couple of minutes as it takes a little bit for rocketchat to sync up with the mongoDB. Once you see the screen below you should be able to access rocketchat by using the IP of you Synology. http://192.168.x.x:3000
You can get fancy with a reverse proxy, which I did for my internet facing server, but I don’t need that complexity (yet) here on my local network. I even used http for my home instance.
Hopefully that helps some folks who want to try this at home. You can reference the original tutorial for some more detailed explanations, but keep in mind I tried for hours to get this to work following that site and it just would not work. There is also a discussion forum attached to that tutorial that may also help you if you run into troubles.